meet me at azuridge

meetmeatazuridge

I think that some of the most relaxing and memorable travel experiences are those that are close to home. There is nothing quite like a staycation. No airplane required. I was recently whisked away 40 minutes out of Downtown Calgary to the stunning Azuridge Estates Hotel with several other Calgarian media friends. Located near Priddis and Spruce Meadows, Azuridge is literally the only luxury spot outside the city limits.

We pulled up to the property in our plush limo bus and I was immediately wowed by the stunning scenery that surrounded Azuridge. I spotted a soaring water tower and large tiered gazebo off in the distance, not to mention the gorgeous wood and stone main buildings. Their friendly staff greeted us eagerly and ushered us inside to celebrate our evening with a glass of bubbly.

After a few pop, fizz and clinks we headed off to check out our rooms for the night. My husband and I were so excited to move into our luxurious room and get well-rested but alas we still had dinner to get to.

We were then toured around the property where we got to see nearly every single room in the place. Not only is there a private theater room where you can stretch back in super comfy chairs and a faux fur blanket. A gorgeous fitness center looks out over scenic foothills and the Rocky Mountains. Talk about an inspiring place to workout. We also found out that one of our fellow attendees’ room had a tent in their loft plus an Xbox console. Lucky!

Soon enough it was time for dinner and we all met up in one of the fabulous dining rooms. The meal was so eloquently presented and each morsel was jampacked with flavour. My favourite part of the meal was the cocktail of New Brunswick lobster and Louisiana crawfish with mango and avocado.

We had only just finished our amazing dinner when out came a wonderful gift from Azuridge! Hunter Boots for everyone! I received a sweet pair of shiny grey boots and Byron got matte black boots. What a great surprise.

Apparently, they wanted to keep the surprises coming because out came Calgary-based musician Michael Bernard Fitzgerald who was going to serenade us this evening by the fireside. Delicious après dinner drinks were offered (I indulged in some Baileys & Hot Chocolate!) and giant marshmallows sat by the fire. MBF played some beautiful songs for us and humorously snuck the word ‘Azuridge’ into his lyrics. It was fabulous.

It was the end of a long week so a tuckered out group of journalists headed off to their rooms for a great night sleep. I was ready for bed too but not before I indulged in the beautifully presented cocktail hydrotherapy bath treatment. Salts served up on a martini glass and bubble bath in a shot glass – this was one deluxe bathing experience. What could really be better than a big jet tub that you can stretch out in. So nice and relaxing after the perfect day.

We checked out in the morning after enjoying a lovely little breakfast with cappuccinos and fresh juice. Watching the sun rise over the property was something absolutely magical. The dewy lawns and the ethereal glow around the forest surrounding Azuridge just added to the fairytale feel.  I could have stayed all weekend.

So, perhaps the next time you feel like you need to get away from the city for some R&R, call me and I will meet you at Azuridge.


photos by kait kucy

triangle divider

Happy Friday!

Feb-22

Longing for summertime roadtrips right now. Byron and I have been brainstorming ideas for camping trips today – can’t wait to hit the road every chance we get once the weather warms up. So many places we want to stop this year – any campground recommendations would be appreciated!

And it is finally Friday. How come short weeks always feel the longest? I’m looking forward to a nice weekend chock full of family visits and exciting brainstorm-y meetings with friends. Besides all of that, I think I will keep daydreaming about summer. What are you up to?

My posts on Vitamin Daily this week:

Pink Marks the Spot

An Affair to Remember

A Touch of Quirk for the Bookshelf

Everybody Was Kung Fu Fighting!

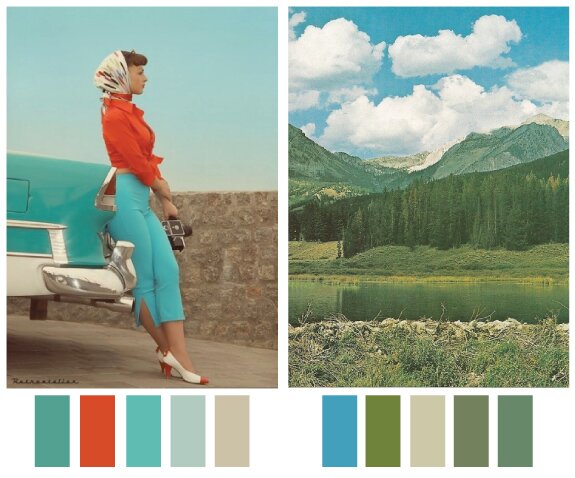
images: 1/

triangle divider

It’s a Mad Mad World

BR Mad Men 1

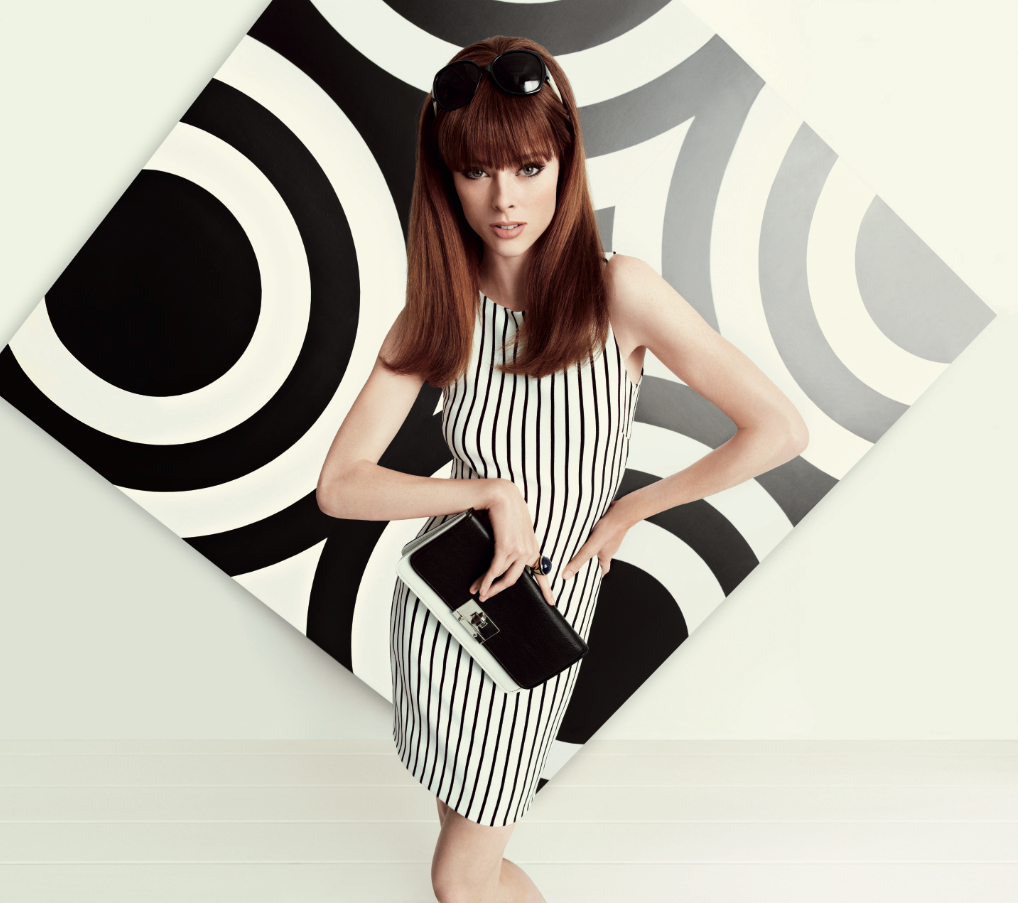
It feels like an awfully long time since I last watched Mad Men. Too be honest, I was losing interest until I saw these photographs today from Banana Republic. Their Mad Men collection is back with a fabulously late-60s vibe! A collaboration with the Emmy Award-winning Costume Designer for Mad Men, Janie Bryant, the collection is deliciously late 60s. The bright popsicle hues paired with op art geometrics has got me ready and reeling for the next season of MM. Inspired by Megan Draper (Canadian-born actress, Jessica Pare) and modeled by the fab Coco Rocha, I can already tell this collection is a winner. It launches in stores on February 27th while the show’s premiere is slated for April 7th.

Spring can’t come soon enough.

BR Mad Men 2

BR Mad Men 3

triangle divider

Organizing Your Crafting Space

This post is brought to you by Jewellery Maker. Everything you need to make your own jewellery.

Image

As an avid crafter and self-proclaimed DIY gal-around-town, my hugest obstacle to getting stuff done is staying organized. When you have feathers, crepe paper, foam core and paints always at the ready, it is really hard to find them a permanent home. And you’d think with the daily reminders from my husband to clean up the crafting supplies all over the living room floor (that I was totally too lazy to pick up after shooting a DIY for the blog) that I would have a grasp at how to make this work.

Well, I am getting there. I am learning. I have been working from home now for about eight months and I need to remember that our entire condo is not our office. I have a dedicated space and I need to stick to it – for the sake of our belongings, our design aesthetic and probably for the sake of my marriage! Like most other married crafters I know, their husband doesn’t appreciate leaving the house with random glitter in his hair or on his face. Haha! So, keeping organized in a dedicated small space is tricky but it also makes you reevaluate your furniture choices and what supplies you absolutely need to keep around. Like everything you need to make your own jewellery.

This past weekend I decided to move my replica tulip table out of the office and swap it with our larger kitchen table. The kitchen table is long and useful for photographing and working on bigger projects. I usually end up out in the kitchen to work on my DIYs so why waste good eating space with hot glue and glitter junk? Now, we have a smaller kitchen table but it actually opens up the space more and is more comfortable to sit at when it is just Byron and I. And now I have this lovely big table in my office that can hold my iMac, sewing machine, cutting mat and paper roll. I am loving it already.

One thing I definitely need more of is shelf space. I have four IKEA Billy bookcases and two small Expedits full of stuff and I am definitely taking a second look at what is on there. I have decided to pack up all of our paperbacks and novels for now. Not only are they taking up valuable supply space but they are really only there for sentimental value and also to make us look super smart. We aren’t going to be re-reading them anytime soon so into boxes and storage they go. I want to make back issues of my favourite magazines more readily available as well as art and photography books that I can grab for daily inspiration. The empty shelves I want to utilize with bins and boxes to organize the supplies I want on hand.

How do I organize within the boxes? Simple, I use my favourite organizational tool out there – ZIPLOC BAGS! These are especially great for loose crafting supplies like beads, paper scraps and past projects. I also like to keep similar tools and supplies in them. I just bagged up all of my glue into one bag so it is at the ready anytime I need them for a crafting event or big project. Seriously, you will thank me for this one.

All in all, the key to staying organized in a somewhat chaotic place is to determine how you work as a crafter and how to compliment your process in the best way possible. You might need to change around your furniture or invest in some new pieces but when you get the formula right, you will be so much more productive and creative than you have ever been!

image by kait kucy
triangle divider

Anthropologie Party

IMG_0024

This past Thursday was an absolute blast! I hosted a Card Workshop at the Calgary Anthropologie and had an absolute blast. Setting up the tables with my favourite crafting supplies (aka GLITTER!) was a thrill and getting to meet new and old friends was such a treat.

The team at Anthropologie was such a dream to work with – the girls in-store set up such a beautiful display of treats and drinks. It was perfect.

The craft turned out to be a hit too! I had sewn up little red and pink vinyl envelopes and made blank cards for the crafters to decorate like crazy. There was some serious creativity brewing in that room, let me tell you. I made a couple of examples of different cards you could make but these girls just took it to a whole new level. I even noticed that a couple of girls brought their own secret papers to make their Valentine’s cards even more special. Now, that is some intense dedication to the craft.

Thanks to everyone who came out to the workshop! I had so much fun meeting all of you and hope to craft with y’all again soon!

Happy V-Day!

xo

photos by: morgan mclaren

IMG_0038

IMG_0093

IMG_0125

IMG_0154

IMG_0176

IMG_0187

IMG_0203

IMG_0222

IMG_0240

IMG_0276

IMG_0309

IMG_0364

triangle divider

CityTV Breakfast Television

292710_529600590407215_1230982055_n

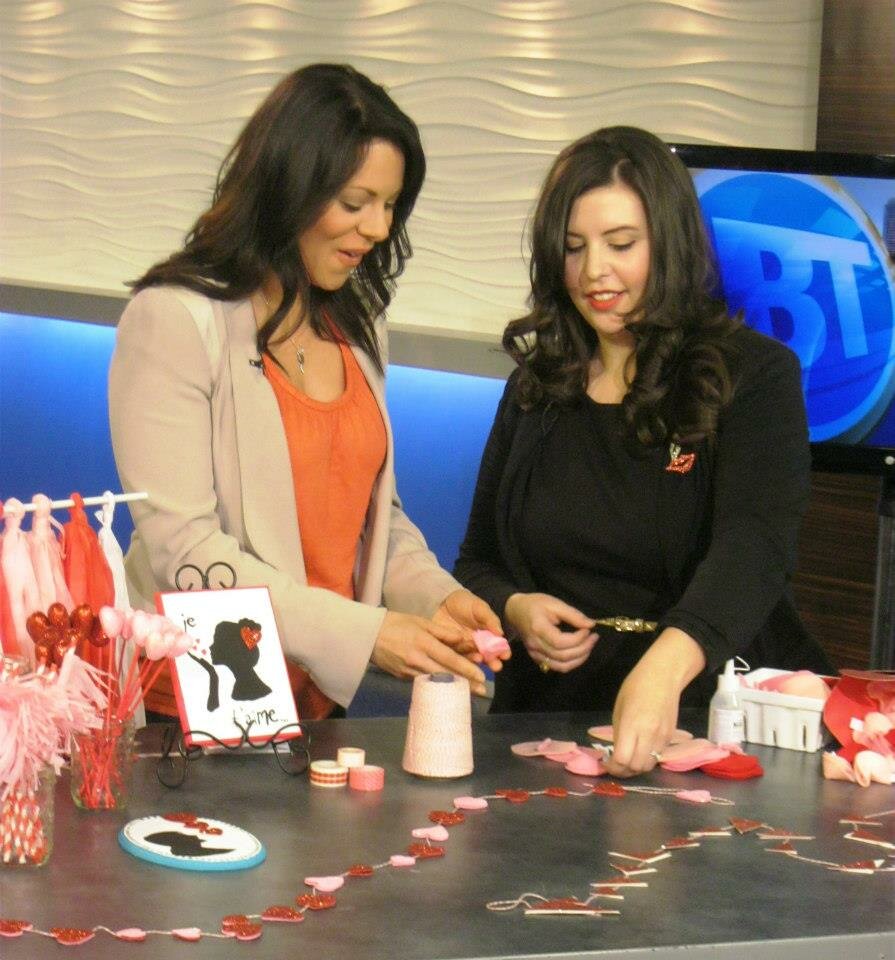
If you live in Calgary, you may have caught me on Breakfast TV this morning sharing some fun Valentine DIY projects that you and your family can whip up! I was super nervous but I think I did a-okay!

You can check me out in action over here showing how to make love-inspired fortune cookies.

Image from BT Calgary!


triangle divider

Frills & Bunting Valentine Decor

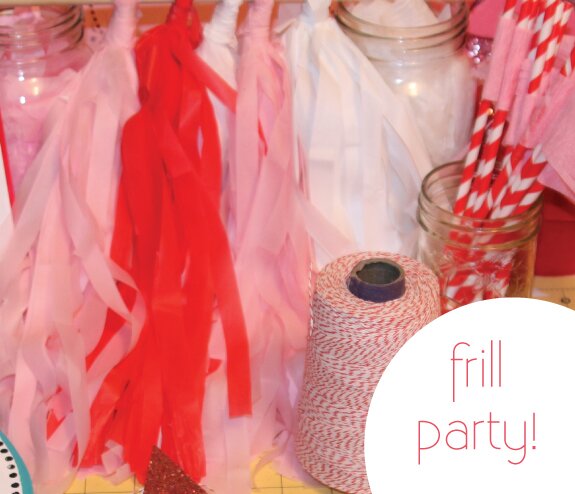
frillparty

Let’s have a Frill Party! I am a big fan of Valentine’s Day so I highly recommend pulling on your ruby red shoes and plan a total love fest for you and your loved ones. Today, I am sharing four quick and easy love-inspired DIY projects that you can easily adapt for your sweet-as-pie soiree.

In this post, I am sharing two great projects for a red & pink themed photobooth at your lovely party. These projects are super easy for kids to work on if they are comfortable using a rotary cutter and hot glue gun. And the best thing about these frills? They are made with plastic tablecloths for the dollar store so you can decorate with style – on the cheap!

To get started on the ever-popular frills here is what you need:

  • Plastic Tablecloths in Red, White & Pink
  • Rotary Cutter
  • Self-healing Mats
  • Ruler
  • Scissors

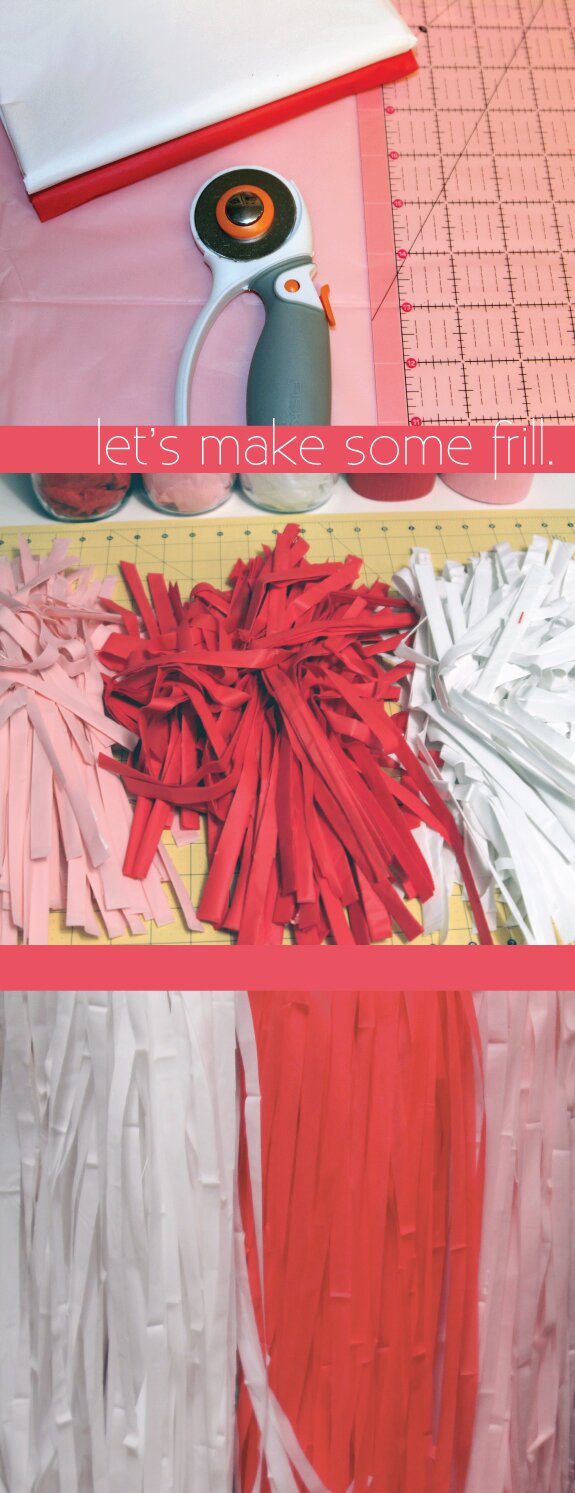
letsmakefrills

Step One: The tablecloths come folded so to save time, I like to cut them like this and then pull them apart after. Line up the tablecloths on the cutting mat and measure off 1/2″ with the ruler. Using your rotary cutter, trim off length. Repeat until you have cut entire length of tablecloth into 1/2″ pieces.

Step Two: Pull apart lengths and drape over a chair, ready for gathering into bunches.

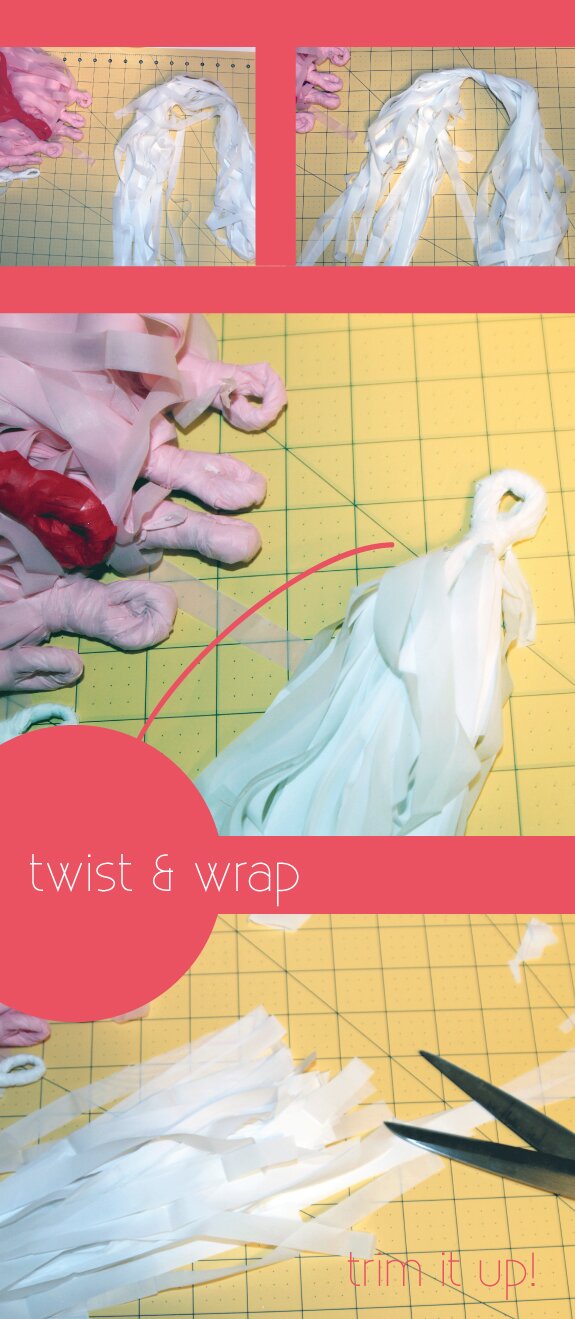
twistandwrap

Step Three: Gather bunches of “ribbon” together and double up, cutting apart loops. Twisting the center of the bunch, pull around and make a thick loop. Using a separate piece of “ribbon” wrap around loop and tie to secure. Trim ends to same length!

glitterbunting

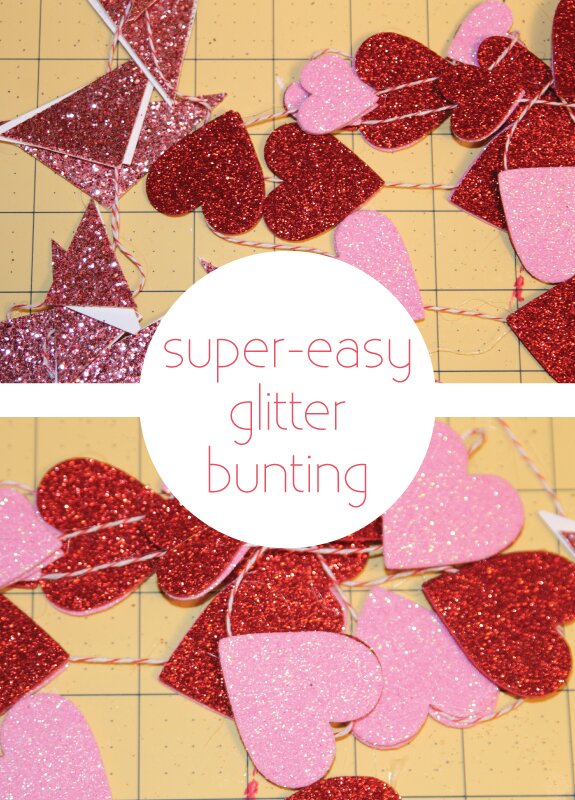
Okay, these glitter bunting banners are the absolute easiest! I just cut out shapes of hearts and triangles in glitter paper and hot glued them to red & white twine. I love how easy these are because they look amazing as a background for a photobooth. You need a lot of these to flesh out the back-drops.

xoxo

Happy Valentine’s Day!

triangle divider

Silhouette Kisses DIY

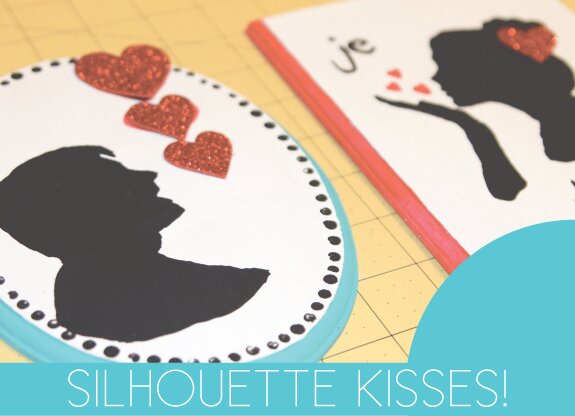
SILHOUETTEKISSES

Smooch! Excited to share another fun and easy DIY craft for Valentine’s Day. This is a great way to get your whole family involved in the holiday crafting and make a super unique and special gift for that special someone. I absolutely love Victorian silhouettes and this is a great modern spin on this traditional portraiture.

Here is what you need to make this adorable V-day gift:

  • Wooden plaques – picked these up from the dollar store!
  • Craft paint
  • Glitter hearts
  • Paint brushes
  • Pencil
  • Self Healing Mat
  • X-acto Blade
  • Washi Tape

BLOWAKISS

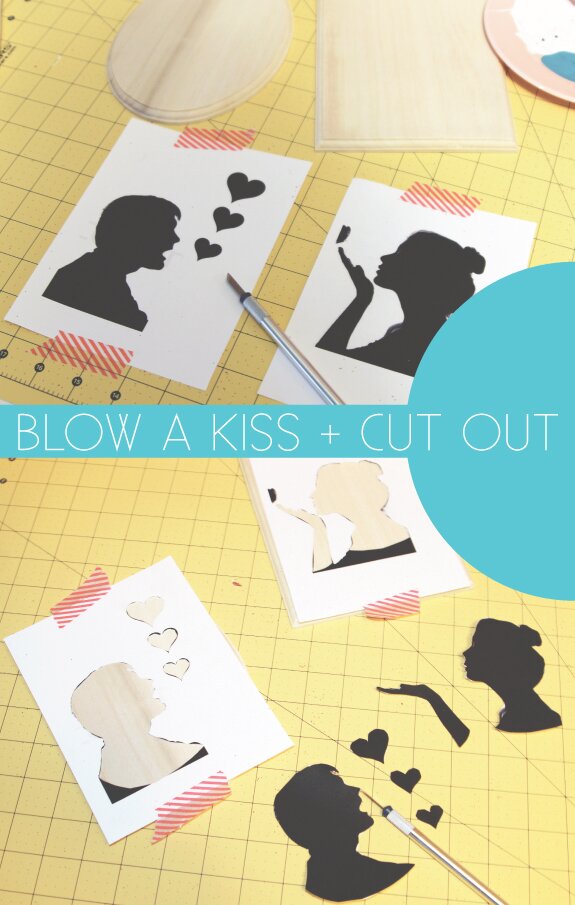
Step One: Create your silhouette! The quickest way to do make your adorable silhouette is to take a photo of your subject against a white wall with a light shining to create the contrast. Open it up in your photo-editing program, up the contrast and make it black & white. Print it out on cardstock.

Step Two: Using an x-acto blade, cut out the silhouette. I used some washi tape to affix them to the mat, so they didn’t move around while I was cutting them out.

paintthebase

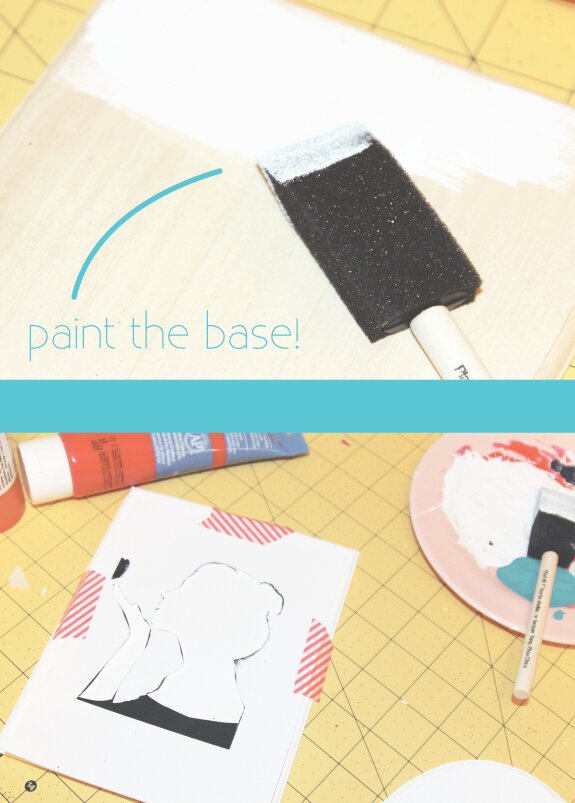
Step Three: After, cutting out your stencil, paint the wooden plaque white with a foam brush and craft paint.

Step Four: Once the plaque has dried, tape your stencil to it and fill in with black paint carefully. You may need to use a smaller brush for detailed parts of the silhouette.

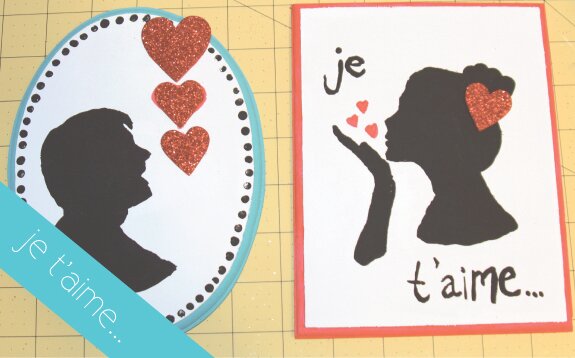
Step Five: Dress up your silhouettes with sweet love-themed notes, red hearts and kisses.

This is the V-day gift that keeps on giving. A wooden card that can be hung on the wall afterwards as a reminder of your love! As I mentioned, super easy project to do with your kids or even a great activity for your Valentine’s Day party! Inexpensive and fun!

xoxo

finishedproduct

triangle divider

Love-ly Fortune Cookie DIY

fortunecookies1

What could be better than receiving a love fortune on Valentine’s Day? This DIY is very easy especially if you are handy with a glue gun and have an arsenal of lovely romance quotes at your disposal. Red & pink non-edible fortune cookies are great party favour for your little V-day get-together. I adapted this how-to from an old Martha Stewart craft and it really only takes minutes!

Here is what you need for this cute craft:

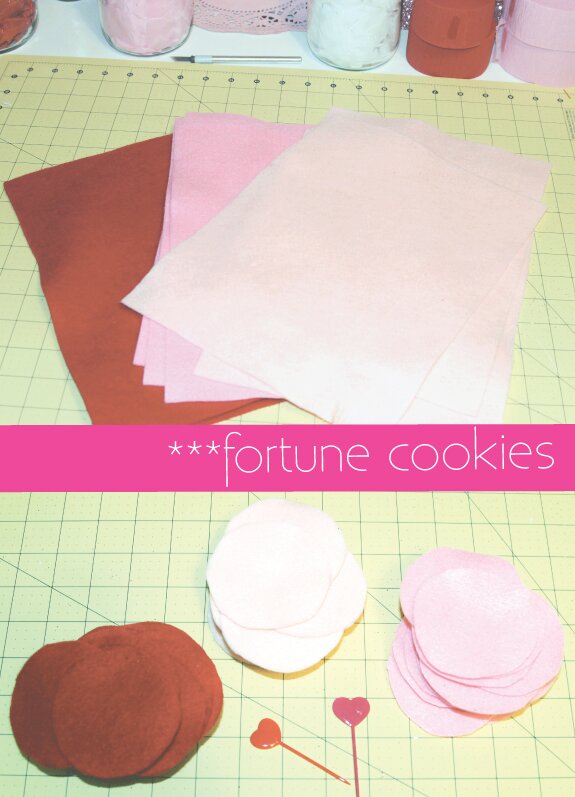
  • Felt in Red & Pink
  • Pipe Cleaners
  • Scissors
  • Glue Gun
  • Fortunes – I just wrote mine in Word and printed out

fortunecookies2

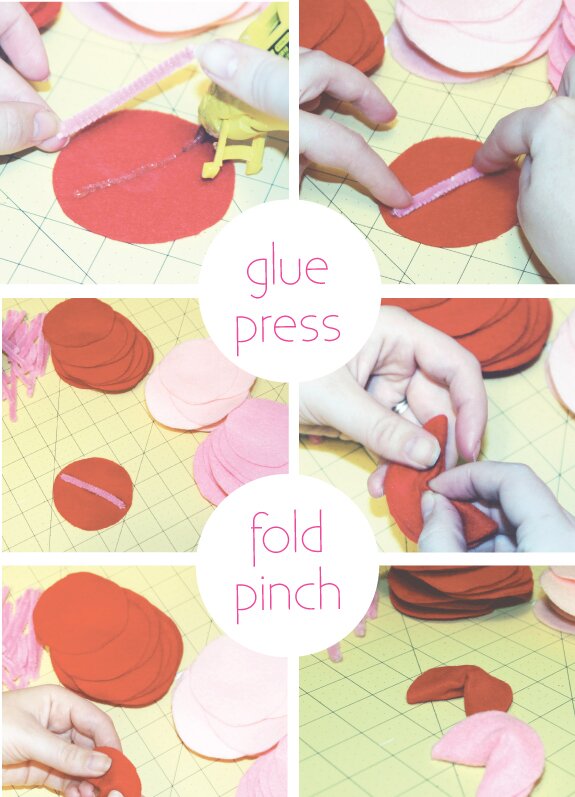
The fortune cookies can be easily condensed into four easy steps: Glue, Press, Fold and Pinch.

Step One: First, cut out 2.5″ circles. Draw a line of hot glue across the center of the circle.

Step Two: Cut a length of pipe cleaner and press into the hot glue. Be careful – the wire may heat up!

Step Three: Once the glue has dried, fold the circle in half.

Step Four: Pinching from the center of the circle, fold the “cookies” in half. Fluff it out a bit to gather the shape of the cookie. Slip in your fortune and you are ready to hand them out!

xoxo

Happy Valentine’s Day!

triangle divider